How to Properly Prep Your Wood Surface for the Scorch Marker
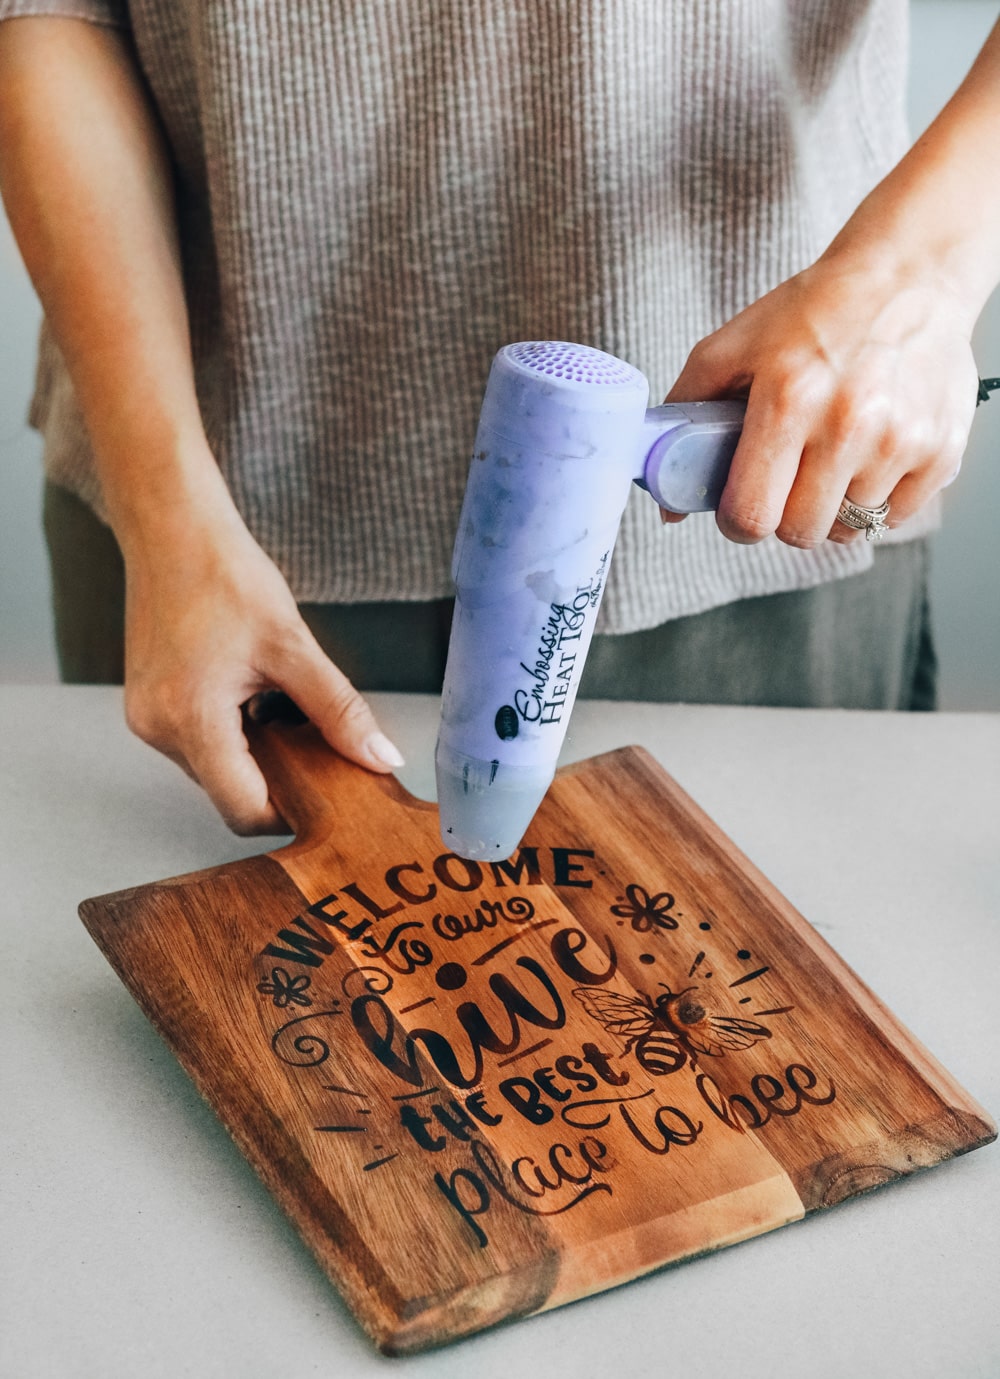
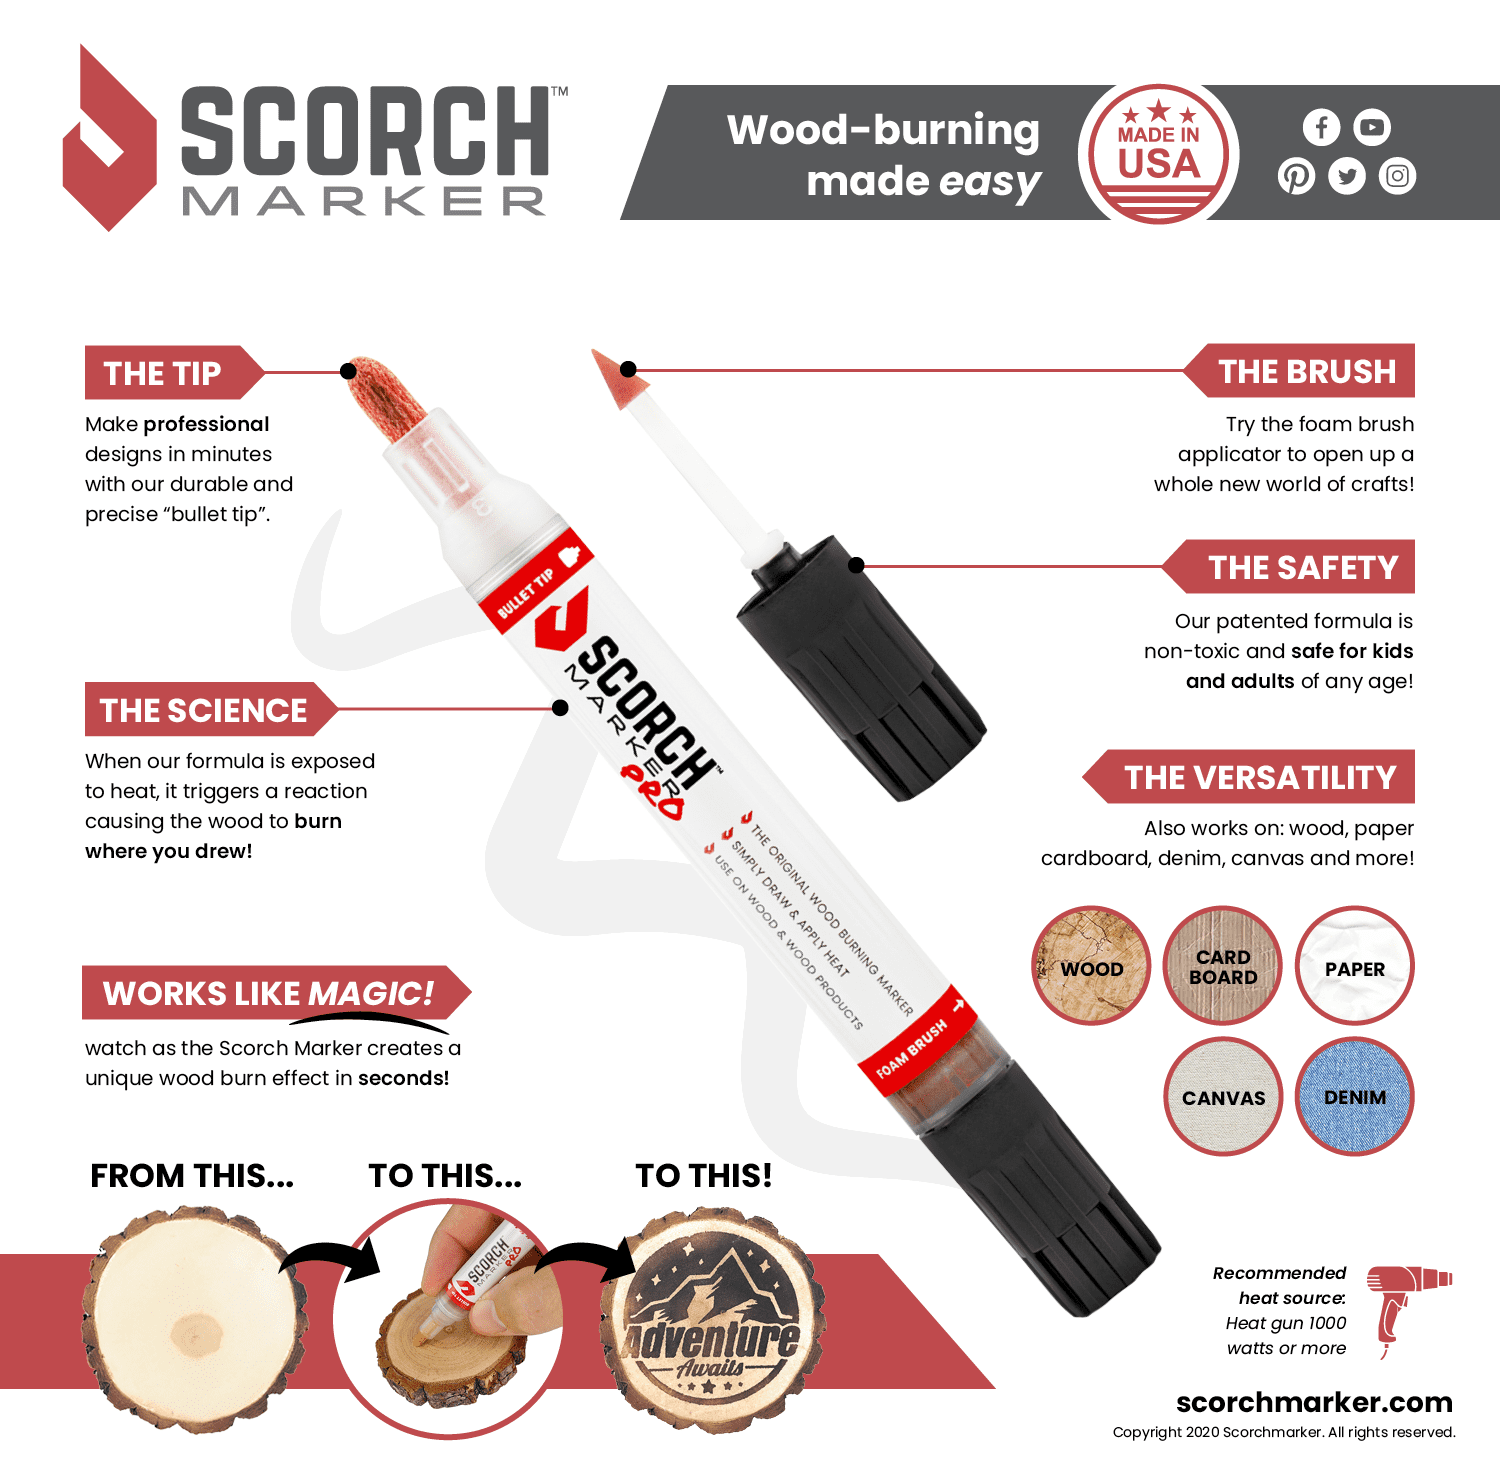
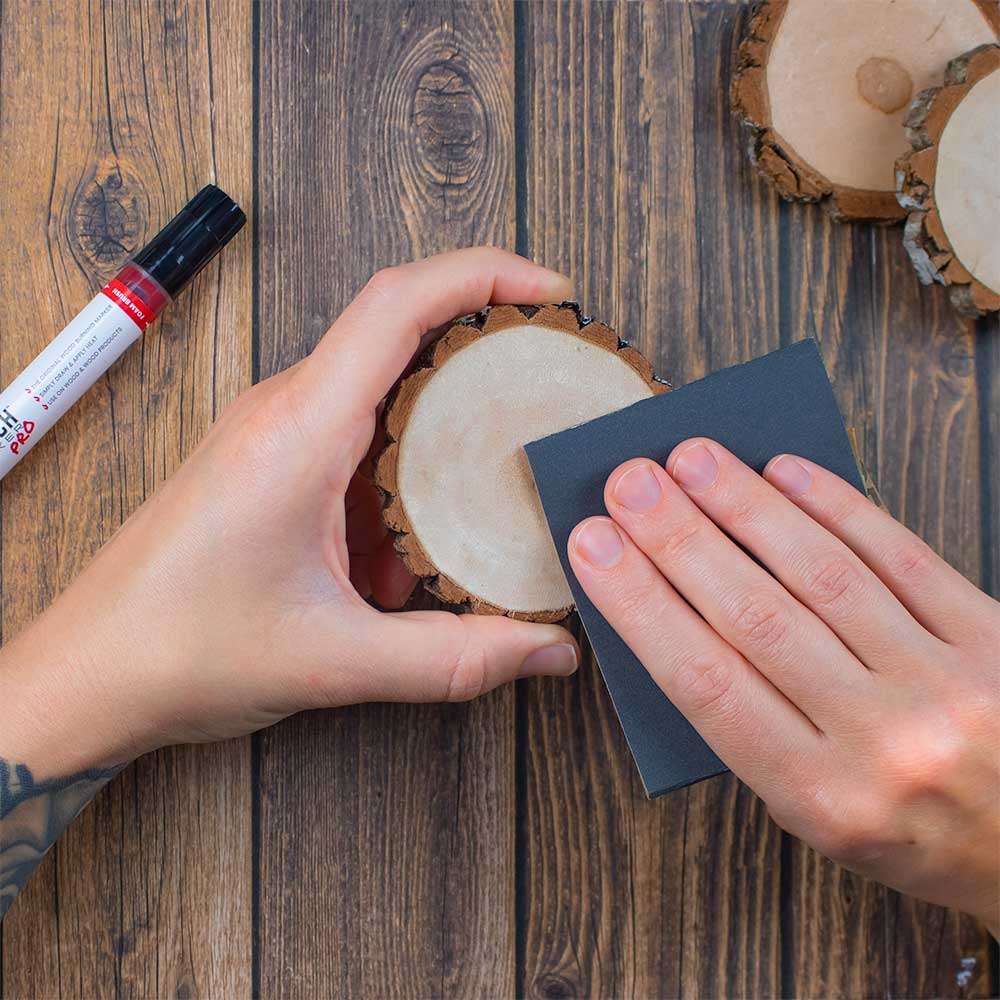
The day you get your new Scorch Marker, it might be tempting to take it to the wood and begin drawing right away. However, for best results, it is so important to prepare your surface, first. Not only will this make it easier to apply your design, but this will also help prevent your lines from bleeding, and make your work more permanent. Preparing Your Wood Surface is Necessary for Successful Crafting A successful craft must be completed in steps. For the Scorch Marker, the most valuable preparation step is in achieving a smooth, even surface. This is done most efficiently through sanding. Sanding your wood removes large (and small) imperfections that may interrupt your drawing. Not only that, but it also provides a better area for the Scorch Marker liquid to soak into. In this article, we’re giving you How to Use a Scorch Marker - Wood Burning for Beginners - Creative Ramblings Here's a little Scorch Marker 101 to ignite your crafty soul 💥 Step 1 How to Make Your Own Laser Engraved Cutting Boards - Creative Ramblings Scorch Marker - How To Use A Wood Burning Pen Tool Scorch Marker - How To Use A Wood Burning Pen Tool HOW TO BURN PICTURES IN WOOD - Lily Ardor How to Burn Designs Into Wood: The EASY Way with Stencils! - Jennifer Maker How to Prepare Your Wood for the Scorch Marker Embossed Shine Sign with Hand Lettering Scorch Marker Woodburning Pen Tool with Foam Tip and Brush, Non-Toxic Marker for Burning Wood, Chemical Wood Burner Set, Do-it-Yourself Kit for Arts and Crafts
The day you get your new Scorch Marker, it might be tempting to take it to the wood and begin drawing right away. However, for best results, it is so important to prepare your surface, first. Not only will this make it easier to apply your design, but this will also help prevent your lines from bleeding, and make your work more permanent. Preparing Your Wood Surface is Necessary for Successful Crafting